
Key Takeaways
What you'll learn in this article
- Show the stem, leaf stalk, and node before making a pothos cutting; a close-up of scissors alone does not teach the decision.
- Keep the selected node visible on the piece you retain, then show the same cutting entering its propagation setup.
- Label later footage with the actual elapsed time and disclose when you use a different specimen.
- Use viewer confusion to choose the next lesson, and compare performance with similar educational posts rather than unrelated reveals.
Key Takeaways
- Show the stem, leaf stalk, and node before making a pothos cutting; a close-up of scissors alone does not teach the decision.
- Keep the selected node visible on the piece you retain, then show the same cutting entering its propagation setup.
- Label later footage with the actual elapsed time and disclose when you use a different specimen.
- Use viewer confusion to choose the next lesson, and compare performance with similar educational posts rather than unrelated reveals.
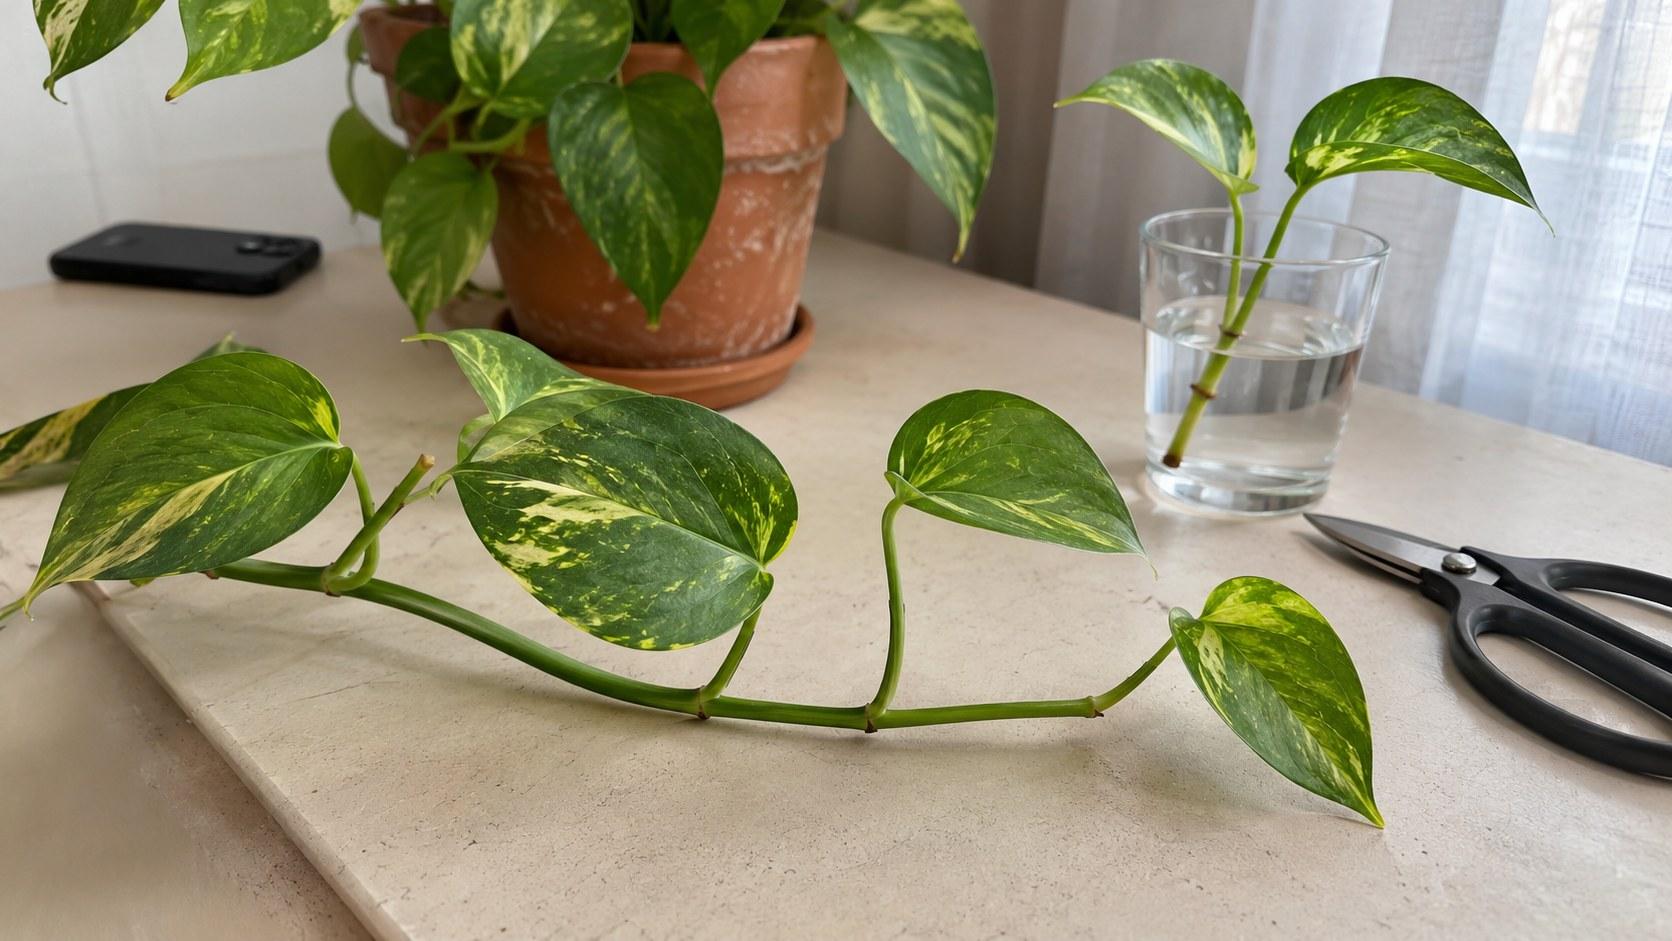
Useful plant propagation TikToks show viewers exactly which part of the plant they need before showing the cut. For a pothos demonstration, identify the main vine, trace a leaf stalk back to its attachment point, show the node you intend to retain, and film the cut without hiding that relationship. Then show where the cutting goes and distinguish the initial setup from any later growth footage.
A jar of beautiful roots makes an attractive ending. It does not necessarily explain how a beginner should prepare their first cutting. This guide is for houseplant creators turning that missing decision into one focused tutorial, not for presenting a universal propagation method for every plant.
Choose one plant and one learner decision
Name the plant before discussing the technique. Pothos is a useful example because its trailing stem can be laid out so the relationship between stem, leaf stalk, and node is visible. Do not intercut footage of different species as though their propagation requirements were interchangeable.
Penn State Extension's pothos guide describes propagation through stem cuttings and notes that pothos develops aerial roots at the nodes. It also distinguishes pothos from the similar-looking heartleaf philodendron. Verify your plant identification before writing captions.
Keep the lesson narrow: “Find the node on this pothos vine before you cut.” That is a complete teaching promise. Root development, transplanting, and diagnosing a failing cutting can become separate lessons when you have appropriate evidence.
Avoid opening with a guaranteed timetable. The University of Wisconsin–Madison's pothos guide describes rooting in water or vermiculite, but its timing guidance is not a guarantee for every home. Your footage should document what happened to your specimen under your conditions.
Make the anatomy readable before touching the scissors
Set the vine against a plain surface that contrasts with the stem. A tangled green background makes a small junction difficult to distinguish even when the video is technically sharp. Move unrelated foliage out of the teaching area without damaging the plant.
Record an establishing shot showing the plant and selected vine. Then move closer and explain three things:
- The main stem continues along the vine.
- The leaf stalk, or petiole, connects a leaf to that stem.
- The node is the attachment region you want the viewer to locate on the stem.
Trace the relationship slowly with a blunt pointer or a finger positioned beside, not over, the junction. If you only point at a brown bump, a novice may memorize a color rather than understand where to look. Show the surrounding structure as well as any visible aerial-root growth.
Add simple labels in the editor if they help. Keep their arrows away from the exact junction until the viewer has seen it unobstructed. Check the draft on a phone, not only on a large monitor: labels that seem modest during editing can cover the whole node in the feed.
Before filming the cut, ask someone unfamiliar with propagation to identify the main stem and selected node from a paused frame. If they cannot, improve the framing or explanation. More dramatic music will not solve that problem.
Show which piece keeps the node
The central shot in plant propagation TikToks should connect your anatomical explanation to the actual cutting. Keep the selected node and intended cut position in the same frame. Say which side you are keeping before making the cut.
Directional phrases can confuse viewers when the vine is horizontal or the camera angle changes. Instead of relying only on “above” or “below,” point to the retained section and explain that this piece includes the selected node. Do not cut through the junction you just told viewers to preserve.
Use an appropriate clean cutting tool and a stable work surface. Position the camera before handling the tool, keep fingers clear, and avoid trying to film handheld while cutting. Penn State notes that pothos contains calcium oxalate irritants; keep plant material away from children and pets, and avoid contact with your mouth or eyes.
Record the approach, cut, and retained piece as one continuous sequence. Once the action is complete, pause with the cutting visible. A fast transition can come afterward, but it should not replace the evidence that the node stayed on the cutting.
If your hand blocks the decisive moment, film a clearer demonstration using another suitable section and identify it as another cutting. Do not splice two specimens together to make the original cut appear clearer than it was.
Connect the cutting to its setup
For a water-propagation demonstration, show the same cutting entering the container. Make the stem section and node position readable, keep the leaves above the water, and explain the setup rather than letting a reflection obscure it.
A plain clear container can make this easier, but attractive glassware is not the lesson. Check the shot from the viewer's angle: a distorted stem seen through a curved jar may be harder to interpret than the cutting shown beside the container first.
State the method you are using. Do not switch between a water setup and a growing-medium setup without explaining that they are different approaches. A short video can deliberately stop at a correctly explained starting point instead of compressing an entire growing process into vague instructions.
Include only care details you can support for the identified plant and method. Refer viewers to the extension sources for broader plant care rather than inventing a universal schedule to fit the length of your caption.
Make later growth footage honest
Save an initial reference photo and a simple record of the date and specimen. If several cuttings are growing together, keep a private identification note so you can recognize the one you filmed. The record does not need to become on-screen clutter.
When you record progress, use the same container position and a similar view where practical. Label the actual elapsed time. If lighting or conditions changed, mention a meaningful change rather than implying a perfectly controlled experiment.
An already-rooted cutting can illustrate what roots look like, but label it as a separate example. Do not present it as an instant result from the fresh cutting. Likewise, a time-lapse or sequence of dated clips should not imply that nothing required attention between recordings.
No visible growth is still an observation. Avoid substituting a healthier specimen merely to deliver the promised reveal. You can explain what you checked and what you do not yet know without diagnosing a hidden problem from a single image.
Turn the demonstration into a next-post plan
Here is a hypothetical brief, not a report of a creator's results:
- Viewer problem: “I cannot tell which part of this vine I should cut.”
- Opening: “Before you cut your pothos, find this junction on the stem.”
- Evidence: An uninterrupted view of the stem, node, cut position, and retained piece.
- Ending: The same cutting in its setup, with any later example clearly identified.
- Follow-up: A dated progress check on that specimen, rather than a generic root reveal.
InsightTok AI can help package this specific lesson through Next Post Studio, which brings together hook ideas, a niche-relevant rising sound, and a suggested posting time. Decide what your demonstration proves first; use the planning suggestions to support that decision.
The hook generator can help produce alternatives, but reject lines such as “Never lose a cutting again.” Your video demonstrates a starting decision, not a guarantee of survival. Choose an opening that makes the learning task obvious.
Keep music optional. If narration identifies the plant parts, it must remain intelligible. Do not shorten the node explanation merely to align the cut with a beat. You can review the broader account-planning tools when deciding how this lesson fits alongside your other plant content.
Review understanding before making the sequel
TikTok's current Studio guidance describes account and video analytics, viewer activity times, and engagement insights. Use the information available in your interface; features and access can vary.
Compare the tutorial with similar educational posts after the same observation period. Read the actual questions alongside the metrics. “Which part is the node?” suggests a different next step from “What happened to this cutting later?” Neither a high view count nor an absence of questions proves that everyone understood.
For your next plant propagation TikToks, choose the unresolved decision you can demonstrate accurately. Refilm the anatomy if it remained unclear, or publish a documented progress update if viewers understood the cut and want to see the outcome. Do not change the plant, hook style, sound, and teaching goal simultaneously and then attribute the result to one change.
Before publishing, confirm that the selected node remains visible, the retained piece is identifiable, time jumps are labeled, and the opening promise matches the footage. When that lesson is ready, try InsightTok AI to plan its hook, sound, and posting window.
InsightTok AI Team
Expert in TikTok growth strategies and social media analytics. Helping creators reach millions with data-driven insights and AI-powered recommendations.
Ready to Grow Your TikTok?
Get AI-powered analytics and content recommendations to boost your views and engagement.
Start Free TrialRelated Posts

Why TikTok Creators Are Moving Their Audiences Off-Platform in 2026
Learn how to audit your dependence on TikTok and move followers into email lists, communities, and other owned channels. Follow a practical 30-day framework for building a more resilient creator business.

The TikTok Monetization Channel Matching Framework 2026: How to Choose the Right Revenue Stream for Every Video
Learn why rising TikTok views can produce lower Creator Rewards payouts and how qualified views affect revenue. Use a practical framework to match every video with the most suitable monetization channel.

How to Build an Email List and Owned Community From TikTok Without Losing Distribution in 2026
Learn how to turn TikTok discovery into an email list and engaged owned community without sacrificing content quality. This guide covers lead magnets, CTAs, measurement, welcome emails, and a practical 30-day plan.