
Key Takeaways
What you'll learn in this article
- Choose the camera angle that reveals the important action, not simply the angle that makes the desk look neat.
- Test the entire movement with both hands in frame before recording the full tutorial.
- Use a secure phone mount, leave room around the work, and keep the demonstration away from interface overlays.
- Plan a result shot, an uninterrupted teaching shot, and a detail shot before adding hooks or music.
Key Takeaways
- Choose the camera angle that reveals the important action, not simply the angle that makes the desk look neat.
- Test the entire movement with both hands in frame before recording the full tutorial.
- Use a secure phone mount, leave room around the work, and keep the demonstration away from interface overlays.
- Plan a result shot, an uninterrupted teaching shot, and a detail shot before adding hooks or music.
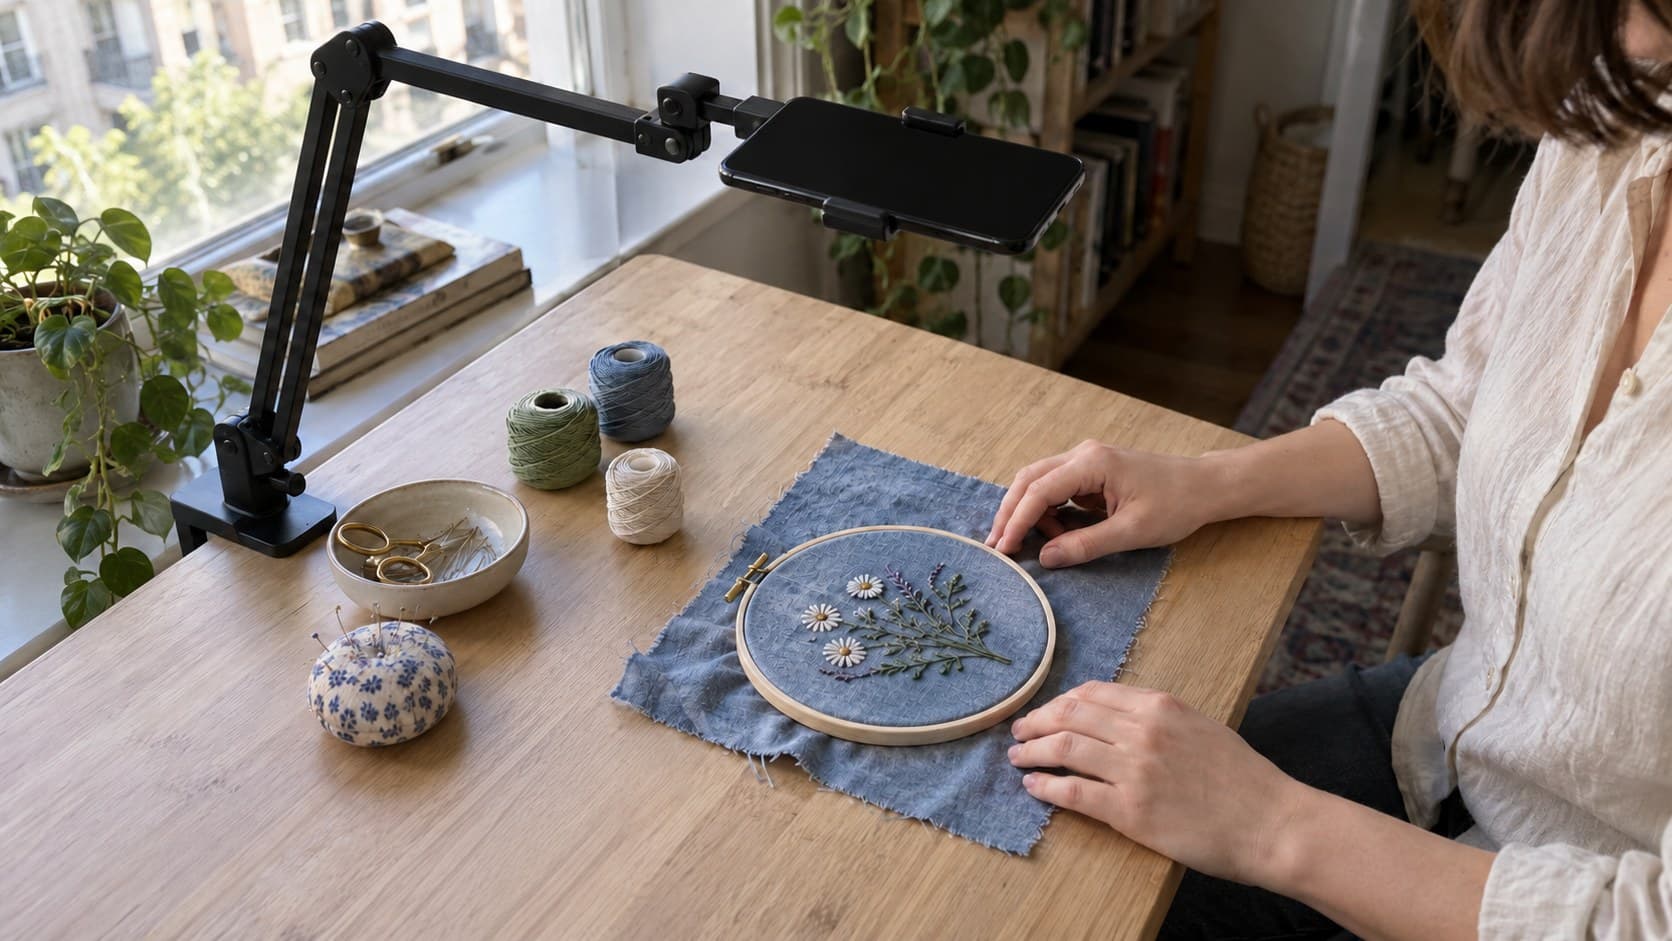
To film overhead TikTok videos clearly, secure your phone above the work surface, frame the actual task vertically, and rehearse the movement while watching for anything your hands conceal. If the essential detail disappears under your fingers, change your grip, rotate the work, or use an angled close-up. A top-down view is useful only when viewers can see what they need to copy.
This is a production workflow for solo creators filming crafts, desk projects, small repairs, or other tabletop demonstrations. It does not require a studio, and a prettier setup is not the goal. The goal is to make one useful action understandable on a phone screen.
Decide whether overhead is the right teaching angle
Start with the moment a viewer must understand. That might be where a thread enters fabric, how two paper edges line up, or which piece fits into a slot.
A straight-down view works well when the important relationships are flat: placement, spacing, arrangement, and the order in which pieces move. It is less helpful when the lesson depends on depth, the underside of an object, or the angle of a tool against a surface.
Before mounting anything, perform the task once and ask:
- What exact contact point does the viewer need to see?
- Will either hand cover that point during the action?
- Does the viewer need a side view to understand pressure, height, or direction?
Choose one main teaching angle and one optional detail angle. Do not force the whole lesson into a top-down composition because other creators use it. A slightly angled view that shows the join is more useful than a symmetrical shot that hides it.
Build a stable setup before touching the record button
Use a phone mount designed to hold the device in the position you need. Follow its load and attachment instructions, check that the clamp is fully secured, and make sure the support cannot tip when the arm extends.
Keep overhead equipment away from hot surfaces, liquids, and any area where a falling phone could cause injury. Do not improvise a hanging phone above a person or balance it on an unstable stack. If the available setup is unsafe, record from a supported side angle instead.
Orient the phone for a vertical video and check the actual camera preview. The camera lens is not necessarily at the center of the phone, so centering the device over the desk does not automatically center the shot.
Leave enough room for your wrists, tools, and the full movement. A composition that fits an idle object can fail as soon as you pull thread, unfold paper, or move a tool away from the work.
Record a short test, then play it back. If touching the table makes the image wobble, adjust the support or move it to a sturdier attachment point before filming the lesson.
Rehearse the hand paths, not just the finished arrangement
The most common visibility problem in overhead TikTok videos is not the camera itself. It is the difference between a clear starting position and an obscured action.
Do one slow practice take using the actual materials. Watch the recording rather than relying on how the desk looks from your seat. Your eyes and the phone have different sightlines.
When a hand blocks the important moment, try these fixes in order:
- Rotate the work so the contact point faces an open part of the frame.
- Move your supporting hand farther from the detail, if that remains safe and practical.
- Change the direction from which the working hand approaches.
- Pause after the action and move your fingers aside to reveal the result.
- Record a separate angled detail if the movement still cannot be seen.
Do not adopt an unsafe grip just to improve visibility. Show the normal technique from a better angle instead.
If the task changes the object permanently, rehearse with spare material before the real take. For a fold, cut, or glued join, prepare a second sample so you can capture a missing detail without pretending the finished piece is still at the starting stage.
Make the work readable on a small screen
Use a background that separates visually from the materials. Pale thread on a pale desk may look calm but be difficult to follow. A plain contrasting mat can be more useful than another decorative prop.
Place the light where your hands are least likely to cast a shadow over the action. A window or soft light from one side is a reasonable starting point; judge it with your hands in their working positions, not with an empty table.
Check reflective tools and glossy surfaces for glare. Move the light, rotate the work, or adjust the camera angle rather than assuming you can repair a hidden detail in editing.
Keep essential action away from the extreme edges. In the posting preview, check that captions, description text, and app controls do not cover the contact point. Do not rely on a single universal safe-area measurement: your actual composition and preview are the useful checks.
Finally, watch the test at normal phone size. If you have to pinch to inspect the detail, record a closer insert. Cropping can help with framing, but it cannot recover an action that your hand completely covered.
Record hands-free without rushing the first movement
TikTok's official Camera tools guidance says the timer lets you record without holding down the record button. It describes selecting a video length, opening Timer, choosing a countdown, setting the maximum recording length with the bar, and starting the countdown.
Use that countdown to settle both hands into the starting position. Leave a brief still moment before beginning, then another after finishing. Those pauses give you clean places to trim without cutting into the explanation.
Controls can differ as the app changes. If your recording workflow is easier in your phone's camera app, record there and use the footage in your edit. The teaching test stays the same: can someone see the start, the action, and the result?
Keep a clean original of each useful take. Add music after you know the demonstration works, rather than rushing a necessary movement to fit a sound.
Plan three shots instead of recording the whole desk session
A small shot list makes overhead TikTok videos easier to film and easier to explain. Start with these three jobs:
1. The result shot
Show the finished detail the lesson will help someone produce. Keep the promise narrow. “Make this corner lie flat” tells a viewer more than “My favorite craft hack.”
2. The teaching shot
Show the starting state and the essential action without an unexplained jump. Keep the contact point visible. If you cut away, make sure the next shot does not skip the exact movement someone came to learn.
3. The verification shot
Show how to tell whether the step worked. That could be aligned edges, a loop that moves freely, or a component seated in the correct place. The result should be inspectable, not merely announced.
For a hypothetical embroidery tutorial, the result shot could show one finished stitch. The teaching shot would show the needle entry and thread movement. If fingers hide the entry point, an angled insert could reveal it; the final shot would show the stitch after the hand moves away. This is a filming example, not a claim about audience results.
Turn the visible action into a specific next-post plan
Write the hook after you know what the footage actually demonstrates. Name the problem visible in the shot, then promise only the fix you show.
If you need alternatives, use the TikTok hook generator to explore phrasing, then remove anything broader than the lesson. A strong opening cannot compensate for an invisible demonstration.
InsightTok AI can help with the surrounding next-post decision through Next Post Studio: useful hooks, a niche-relevant rising sound, and a personalized posting time. Use that planning support after selecting the task and the proof shot. It should not dictate an awkward camera angle or a pace that hides the technique.
Treat the sound as optional support. If the lesson benefits from hearing a click, scrape, or spoken instruction, preserve that information instead of burying it under music.
Run the final visibility check
Before publishing, watch the edit once without stopping and once while inspecting the critical movement. Confirm that:
- The opening promise matches the technique shown.
- The starting materials and their orientation are clear.
- Both hands stay inside the useful recording area.
- The essential contact point is visible when it matters.
- Text and controls do not obscure the work in the posting preview.
- The ending shows a recognizable success check.
If one step fails, reshoot that step rather than rebuilding the entire tutorial. Save the stable setup and shot list so your next demonstration begins with a working production method.
When you are ready to package that clear lesson into a next-post plan, try InsightTok AI.
InsightTok AI Team
Expert in TikTok growth strategies and social media analytics. Helping creators reach millions with data-driven insights and AI-powered recommendations.
Ready to Grow Your TikTok?
Get AI-powered analytics and content recommendations to boost your views and engagement.
Start Free TrialRelated Posts
Why Your Voice Comments Section Is Becoming Your Biggest Moderation Nightmare: The Rich-Media Comment Management Framework to Automate Audio Screening, Prevent AI Voice-Clone Impersonation, Block Harassment in Comments, and Scale Community Without Reviewing Hours of Audio Daily
Navigate the challenges of TikTok voice comments moderation with our step-by-step guide. Leverage AI technology to automate the process and maintain a safe, engaging community.
Why Your TikTok One Pay Payments Get Rejected Without Clear Reasons: The Creator Dispute Resolution Framework to Track Approval Rules, Negotiate Brand Cancellations, Recover Contested Payouts, and Protect $500-$2000+ Monthly Revenue in 2026
A comprehensive guide to understanding TikTok One Pay disputes, rejected payments, and the creator dispute resolution framework.
Echo in TikTok Videos? Fix Your Recording Setup Before the Next Take
Reduce echo in TikTok videos with a three-take room and microphone test, a clear repair limit, and a repeatable setup for your next post.