
Key Takeaways
What you'll learn in this article
- Show both fabric faces before stacking the pieces, so beginners can follow the orientation rather than guess it.
- Keep the flip and placement in one continuous shot; save jump cuts for steps that do not change which face is visible.
- Open the stitched sample to connect the hidden fabric faces with the finished result.
- Use viewers’ specific orientation questions to choose a focused follow-up, not an unrelated sewing trend.
Key Takeaways
- Show both fabric faces before stacking the pieces, so beginners can follow the orientation rather than guess it.
- Keep the flip and placement in one continuous shot; save jump cuts for steps that do not change which face is visible.
- Open the stitched sample to connect the hidden fabric faces with the finished result.
- Use viewers’ specific orientation questions to choose a focused follow-up, not an unrelated sewing trend.
To teach right sides together in a sewing TikTok, first identify the face of each fabric piece, then show those faces meeting without cutting away. Keep the camera position steady and finish by opening the stitched sample. The viewer should be able to explain what is touching, what is facing the camera, and what will show on the outside after the seam opens.
This is a filming problem as much as a terminology problem. An experienced sewist may understand an instruction from a quick gesture. A beginner sees a printed rectangle, an edit, and a pale rectangle beneath the machine foot—and misses the action that connects them. Your next post can solve that one missing step instead of squeezing an entire project into a shorter tutorial.
Choose one orientation question before filming
Decide whether your video answers “Which face is the right side?” or “How do I place two pieces once I know their faces?” Those are related questions, but they need different demonstrations.
For a first orientation lesson, choose a fabric whose faces are easy to distinguish. Tell viewers that you are using this sample for visibility, not presenting a universal test for every material. Some fabrics look similar on both faces; others have a more obvious intended outside. Follow the fabric and pattern instructions for the project you are actually teaching.
Keep the promise narrow: “Here is where the printed faces go before this ordinary seam.” Do not imply that every sewing construction uses the same arrangement. Specialty seams and particular pattern steps can require different sequences. A focused demonstration is easier to follow than a rule delivered without its boundaries.
Before recording, write down the exact confusion you want to remove. For example: “The learner thinks both printed faces should remain visible while sewing.” That sentence tells you which shot matters most: the moment one printed face disappears against the other.
Prepare a sample that makes the faces distinguishable
Use two manageable woven-cotton rectangles rather than a full garment. Avoid a large sleeve or curved piece for this explanation; shape matching would introduce a second problem before the orientation is clear.
Lay both pieces beside each other with their printed faces visible. Leave enough space around them to flip one without moving it out of frame. Choose a plain table surface that contrasts with both the print and the pale reverse.
A simple preparation checklist helps:
- Use fabric with a visibly different face and reverse.
- Remove unrelated pattern pieces from the work area.
- Keep the edge you will join in the same part of the frame.
- Place clips where they will not conceal the corner used for the reveal.
- Record a short test to check that the pale reverse has not washed out in bright light.
If your actual project uses a nearly identical-looking solid, teach the orientation first with the clearer sample, then show how you mark the chosen reverse on your project pieces. Test any removable marker on a scrap and follow its instructions. Do not let the marking method become an unannounced extra lesson.
Film the flip and stack without an edit
The essential right sides together shot begins before the pieces touch. Show the first printed face, indicate the second, then turn one piece over onto the other in a single continuous movement.
Keep the camera fixed during that action. An overhead view can work, but a slightly angled close-up is also useful if it makes the lifted corner easier to see. The requirement is readable orientation, not a particular filming rig.
Use narration tied to the visible action: “This printed face meets that printed face. Now the pale reverse is on top.” These are example script lines, not quoted viewer comments. Say them while the matching surfaces are visible, rather than explaining everything after the stack is complete.
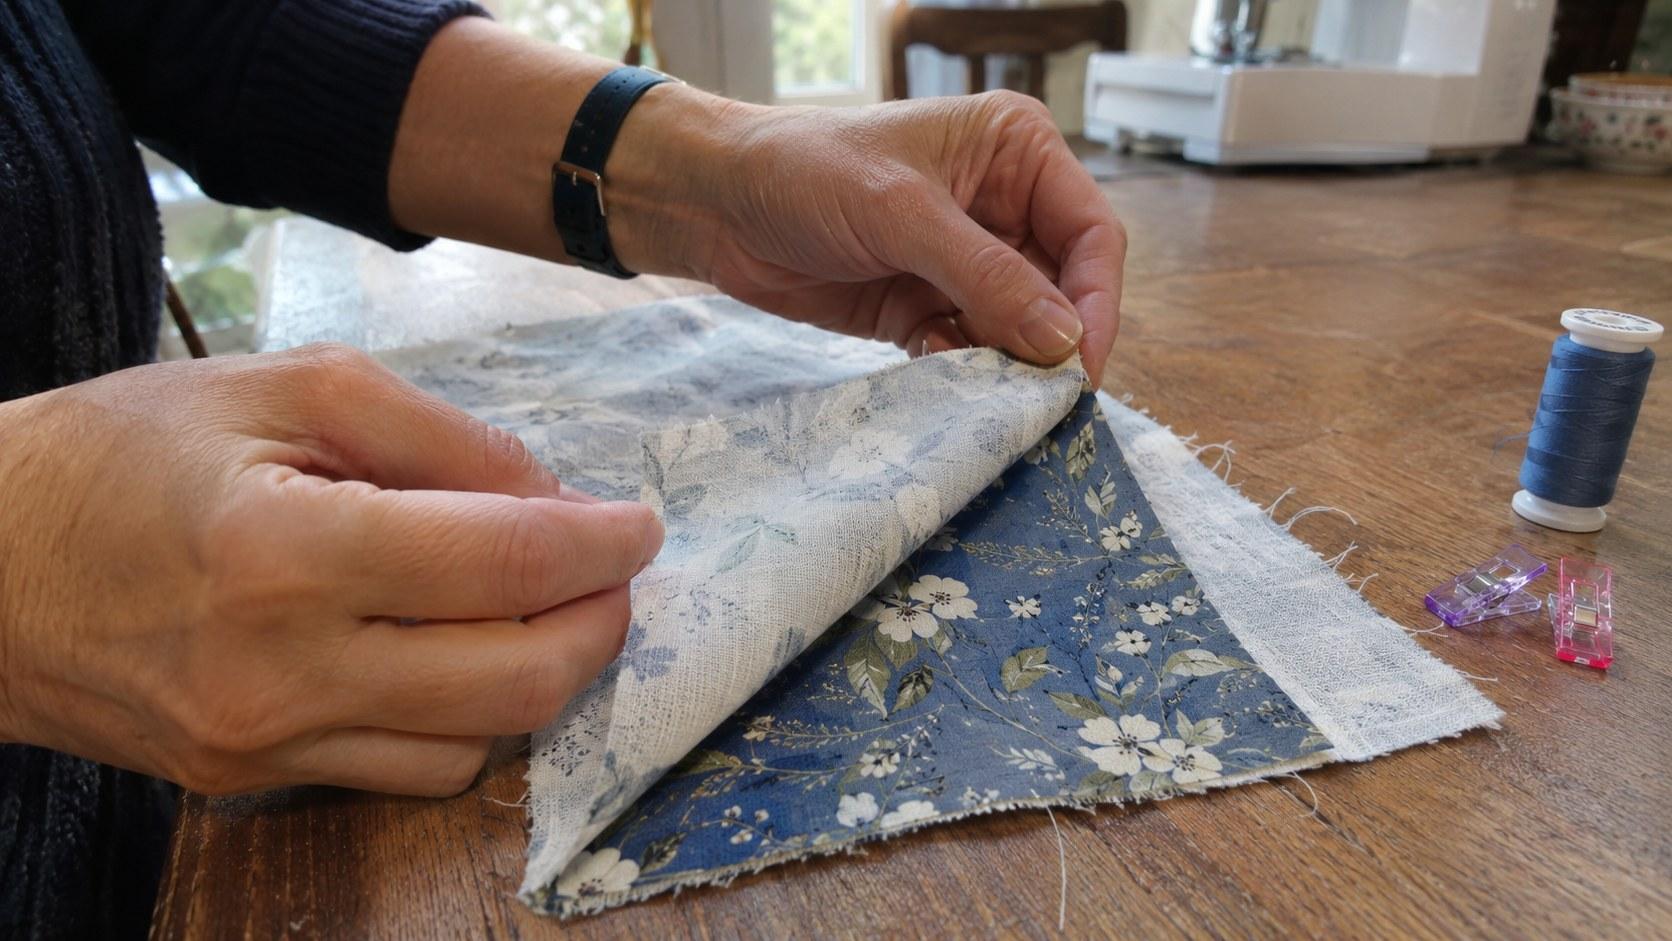
Pause with a corner lifted so viewers can see the two printed faces inside. Then lower it and align the edge you intend to sew. Avoid repeatedly flipping the stack for emphasis; each extra turn gives a beginner another orientation to track.
You can trim dead time before the movement begins and after the stack settles. Do not cut across the turn itself. If your hands block the contact point, reshoot from a slightly different position instead of hoping a caption will repair missing visual evidence.
Connect the hidden faces to the finished seam
A stacked sample only answers half the question. Show why the arrangement matters by opening a prepared stitched sample and revealing the print on the outside of the joined pieces.
You do not need to film a complete machine-sewing sequence for an orientation post. If you switch to a previously stitched sample, say so and match its fabric, size, and orientation to the first one. A silent substitution can make a clear demonstration confusing again.
Use this compact sequence:
- Establish the printed faces beside each other.
- Show the continuous flip and placement.
- Lift the corner to reveal the faces touching inside.
- Indicate the edge that will be stitched.
- Show the stitched sample in the same position.
- Open it to reveal the outside and briefly show the seam allowance on the reverse.
Hold the result long enough to connect it with the starting arrangement. Do not race into trimming, finishing, pressing, and styling unless those actions are necessary to answer your stated question. They can be separate follow-ups.
The viewer’s test is simple: could they pause before the seam is sewn and reproduce the stack with two scraps? If not, a beautiful finished reveal has not done the teaching work.
Write a hook that promises an observable answer
Lead with the confusion, not a broad promise to transform someone’s sewing. Useful example hooks include:
- “Which fabric face should be visible before you sew this seam?”
- “The fabric flip that gets lost between tutorial cuts.”
- “Before you clip these pieces, check what is touching inside.”
Then deliver the demonstration immediately. A long introduction about beginner mistakes delays the exact shot the viewer came to see.
The hook generator can help you draft alternatives, but edit every option against the footage. If your hook promises an easy way to identify every fabric’s face, a demonstration using one printed cotton does not fulfill it. Narrow the wording instead of inflating the lesson.
Keep music below the explanation, or omit it if it distracts. A fashionable sound does not replace audible terms or visible cloth movement. Choose the pacing around the flip and the reveal rather than forcing those steps onto beats.
Review the export like a first-time learner
Watch the actual exported video on a phone, not only the editing timeline. First watch with sound off. Can you identify the two faces, see which one turns, and recognize the final outside? Then listen without watching: does the narration describe the same sequence in the same order?
Check captions carefully. Automatic transcription can turn ordinary sewing vocabulary into a different phrase. Use consistent terms for the face and reverse instead of switching among several labels without explanation. Place any manually added labels away from the lifted corner and joined edge.
Ask a person unfamiliar with the lesson to point to the surfaces that touch. If no tester is available, leave the edit for a while and review it again without relying on your memory of filming. A clip that only makes sense because you know what happened off-camera needs another shot.
Turn the response into a specific next-post plan
After publishing, separate orientation questions from construction questions. “Which print faces inward?” suggests the stack is still unclear. “How far from the edge do I stitch?” is a different lesson. “What if both sides look identical?” points to sample selection and marking.
TikTok’s current TikTok Studio guidance describes account and video analytics, viewer activity times, and engagement insights including comments and future-post inspiration. Use the tools available in your interface; access and features can vary. Those tools can inform a decision, but they cannot prove that one edit caused a post’s performance.
Review comparable teaching posts after a similar observation period. Look at available engagement and viewing metrics alongside the actual questions. Saves may be useful context, but they do not establish that someone successfully reproduced the seam. A specific comment can suggest the next demonstration without representing your entire audience.
InsightTok AI can help turn that decision into a practical next-post plan through Next Post Studio, pairing hook options, a niche-relevant rising sound, and an account-informed posting time. Keep the lesson fixed first. Use those suggestions to package the explanation, not to replace it with an unrelated trend.
For the next test, retain the same basic topic and change one meaningful teaching element, such as holding the corner reveal longer. This is practical editorial guidance, not a promised distribution tactic. The goal is to make the next right sides together demonstration easier to reproduce and easier to evaluate.
When you have identified the question your next video should answer, try InsightTok AI to turn it into a focused posting plan.
InsightTok AI Team
Expert in TikTok growth strategies and social media analytics. Helping creators reach millions with data-driven insights and AI-powered recommendations.
Ready to Grow Your TikTok?
Get AI-powered analytics and content recommendations to boost your views and engagement.
Start Free TrialRelated Posts

How to Optimize Your Creator Profile for TikTok’s AI Discovery System in 2026
Make your TikTok profile easier for AI discovery systems and brands to understand. This guide covers bios, topic signals, analytics, commercial readiness, pricing, and creator rights.

Why TikTok Creators Are Moving Their Audiences Off-Platform in 2026
Learn how to audit your dependence on TikTok and move followers into email lists, communities, and other owned channels. Follow a practical 30-day framework for building a more resilient creator business.

Plant Propagation TikToks: Show the Node Before the Cut
Help beginners identify a pothos node before cutting, follow the same specimen into its setup, and understand honestly dated propagation updates.