
Key Takeaways
What you'll learn in this article
- Build a clasp tutorial around one question: where to press, where to insert the ring, or how to check the closure.
- Keep the mechanism at a repeatable distance from the camera instead of moving it toward the lens during the demonstration.
- Show the closed, open, insertion, and secured states without hiding the decisive movement behind fingers or a cut.
- Judge the finished clip at ordinary phone-viewing size before choosing its hook, sound, and posting window.
Key Takeaways
- Build a clasp tutorial around one question: where to press, where to insert the ring, or how to check the closure.
- Keep the mechanism at a repeatable distance from the camera instead of moving it toward the lens during the demonstration.
- Show the closed, open, insertion, and secured states without hiding the decisive movement behind fingers or a cut.
- Judge the finished clip at ordinary phone-viewing size before choosing its hook, sound, and posting window.
Clear jewelry TikTok videos show how a small mechanism works, not just how the finished piece sparkles. For a clasp demonstration, stabilize the phone, find a distance where the clasp stays sharp, and rehearse the opening and closing action with your fingers out of the viewer's sightline. Record the important movement continuously, then check whether someone can follow it without your explanation.
This is practical production guidance for jewelry makers and tutorial creators. It is not a claim that close-up footage receives special treatment from TikTok. The immediate goal is simpler: make your next post answer the question a beauty montage leaves unresolved.
Choose one clasp question before recording
A viewer asking “How does this fasten?” might need several different explanations. They may not know which part moves, which loop receives the clasp, or whether the fastening can be handled while the bracelet is on their wrist.
Choose one of those questions for the next video. A tabletop demonstration of a lobster clasp can explain its moving lever. It cannot, by itself, prove that everyone will find the bracelet easy to fasten one-handed.
Write a narrow promise:
- “Here is the lever that opens this lobster clasp.”
- “This is the ring the clasp attaches to, not the decorative link beside it.”
- “Watch the opening close after I release the lever.”
Use the actual fastening on the piece you are showing. If you use an enlarged sample to explain the movement, identify it as a demonstration sample and return to the real item. Avoid implying that different clasps behave identically.
Build a sharp working area, not the tightest possible shot
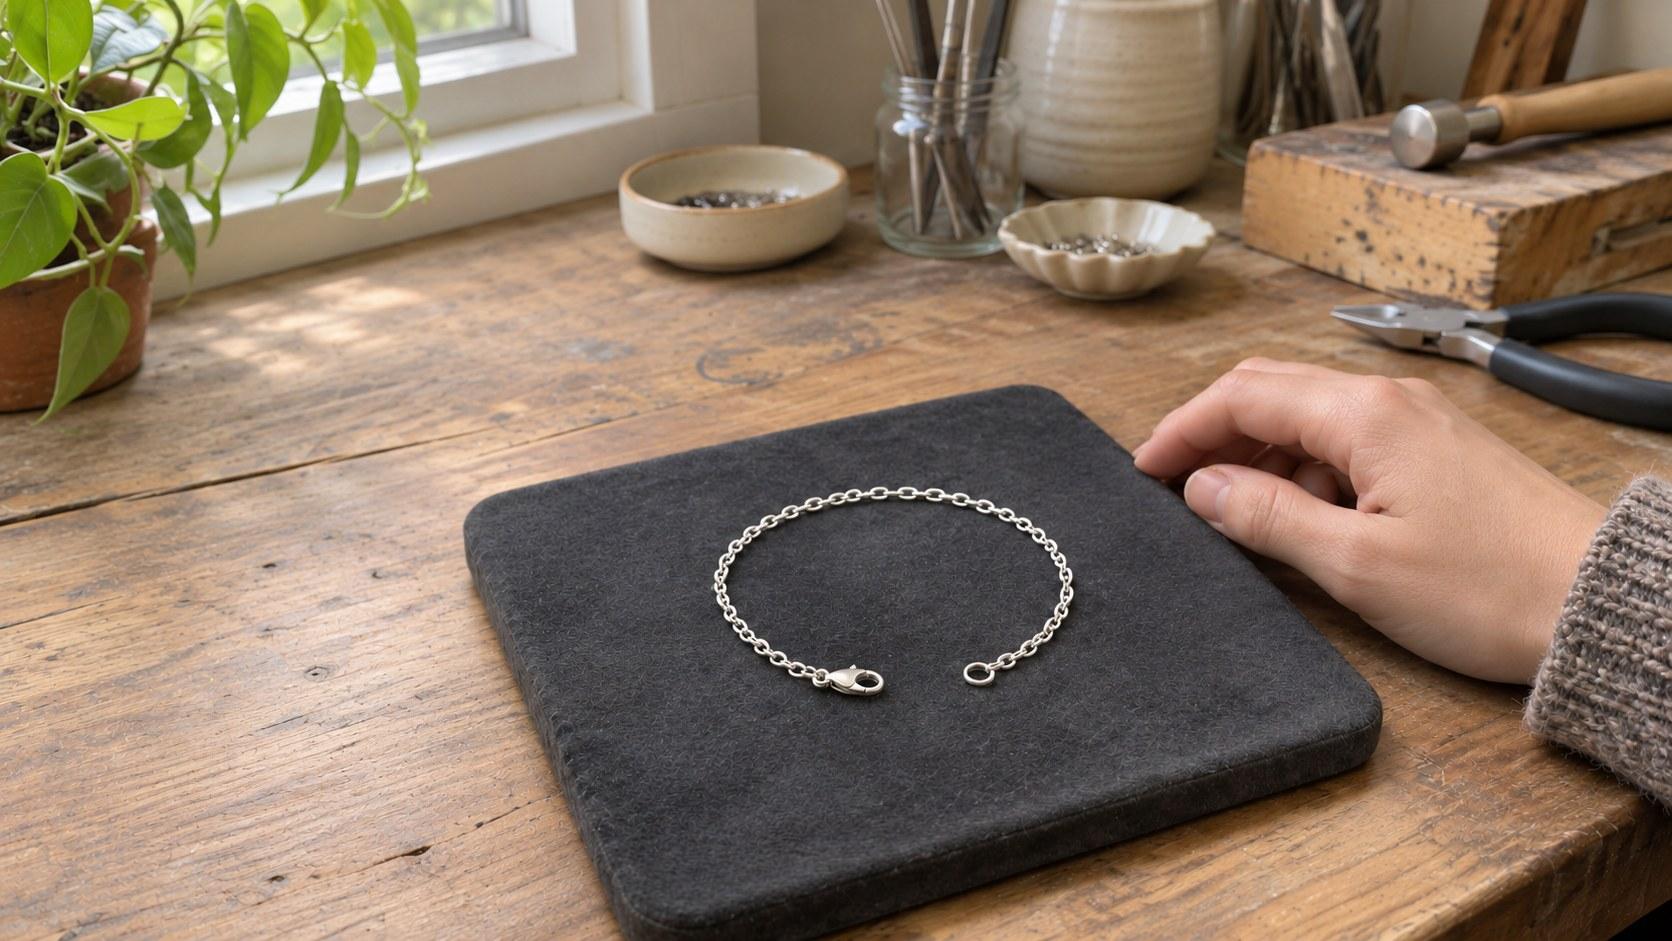
Start with the clasp resting on a plain, nonreflective surface. Choose enough contrast to separate the metal outline from the background. A busy fabric pattern can make a tiny opening difficult to distinguish even when the camera has focused correctly.
Clean the phone lens and inspect the jewelry for visible dust, following the maker's care instructions rather than applying an arbitrary cleaning product. The International Antique Jewelers Association's phone photography guide recommends a clean lens and jewelry, an unobtrusive background, and backing away when getting too close causes blur. Those preparation principles are useful for video too.
Mount the phone on a stable support with its camera facing the work area. Leave room for your hands to move without knocking the support. Begin slightly wider than the final framing you imagine. A readable clasp with room for the action is more useful than a frame-filling blur.
Record a test while opening and closing the mechanism. Check the saved clip, not only the live preview. If the clasp moves out of focus when you lift it, bring your hands back to the original working distance or change the setup to match the actual movement.
Use macro deliberately, if your phone supports it
Apple's macro photo and video guide explains that supported iPhones can switch to the Ultra Wide camera for close-up capture. It also describes controls for automatic macro switching and suggests backing up when footage becomes blurry. Availability and controls depend on the model.
Do not assume that moving closer always adds useful detail. At very close distances, your phone can block light, your hands have less working room, and small movements become conspicuous. Test the camera mode you intend to use before recording the complete explanation.
If your recording app offers focus locking, try it after positioning the clasp. Then repeat the full movement. A lock prevents the camera from choosing a new focus target; it does not keep a clasp sharp when you move it to a different distance.
Solve finger blocking before changing the camera
In jewelry TikTok videos, the problem is often not the lens. It is that the thumb doing the useful work also hides the moving part.
Place the clasp so its opening faces the camera at a slight angle. Hold the chain behind the mechanism rather than covering the mechanism itself. Practice pressing the lever while leaving the opening visible from the phone's position.
Check three moments separately:
- Before pressing: can the viewer identify the lever and the opening?
- While pressing: can the viewer see the gap appear?
- During release: can the viewer see that gap close again?
If one moment is blocked, adjust the angle of your hands or the phone. Do not force an uncomfortable grip simply to imitate a polished tutorial. A different camera position may show the action more clearly while allowing normal handling.
You can use a stationary close-up to identify the parts before demonstrating them. If you point with a tool, keep it clear of the moving mechanism and remove it before operating the clasp. Avoid pulling or bending delicate parts to make the action more dramatic.
Record four visible states
Think of the demonstration as a short explanation with observable checkpoints, not a sequence of glamorous cuts.
1. Closed and oriented
Show the fastening closed, with the receiving ring nearby. Briefly establish which piece of jewelry it belongs to so the close-up has context. Name the part you will press using plain language.
2. Open
Press the lever and hold the open state long enough to see the gap. Keep the clasp at the same working distance. If your fingers obscure the opening, stop and fix the angle rather than hoping narration will compensate.
3. Ring inserted
Bring the receiving ring through the visible gap. Preserve this movement in the edit. A cut from an open clasp to an attached chain removes the step a beginner may need most.
4. Released and checked
Release the lever and show the opening closed around the ring. Use only a gentle check appropriate to the item. Do not turn a basic fastening demonstration into an unsupported strength or durability test.
If the tutorial is about fastening a bracelet while wearing it, add a real on-wrist demonstration. Keep the tabletop explanation and the wearing test distinct: understanding the mechanism and manipulating it one-handed are different tasks.
Edit for comprehension before adding music
Replay the first edit without sound at normal phone size. Can you identify what moved and where the ring went? If not, make the action clearer before adding more captions.
Use a short label to identify the lever or receiving ring, but keep text away from the mechanism. Preview the post in the posting interface so captions and controls do not cover the detail you worked to reveal.
A slower replay can supplement a clear normal-speed demonstration. It should not replace it or disguise an awkward cut. Likewise, a tighter crop is useful only while the mechanism remains sharp enough to inspect.
Keep useful natural sound when it genuinely clarifies the action, but do not add an artificial click that implies a closure your item does not make. Avoid heavy smoothing, sharpening, or effects that erase the gap or create an inaccurate metal edge.
Turn the clear demonstration into your next-post plan
Once the footage works, write a brief with four entries: the viewer's question, the visible answer, an honest opening sentence, and one unresolved follow-up. For example, a hypothetical jewelry maker might explain a lobster clasp today and show the same bracelet being fastened on a wrist next. That is an illustrative sequence, not a reported customer result.
InsightTok AI can help with the packaging through Next Post Studio: hook ideas, a niche-relevant rising sound, and an account-informed posting time. Choose suggestions that support the actual lesson. A dramatic hook about an “unbreakable clasp” would be inappropriate when your footage only demonstrates opening and closing.
If you need alternative openings, use the hook generator to explore wording around the specific viewer question. Keep any music beneath the explanation, and check that you have the appropriate rights for the way the post will be used. A sound suggestion is not permission for commercial use.
After posting, record what viewers still ask. Distinguish confusion about the footage from a genuinely new question about the jewelry. Compare similar demonstrations using your available analytics after a consistent observation period; do not attribute a performance change to camera positioning alone.
InsightTok AI can support that next-post decision, but it cannot determine whether a clasp is secure from your filming plan. Keep product claims grounded in the item and the evidence you actually show.
Your final clasp-video check
Before publishing jewelry TikTok videos built around a tiny mechanism, confirm that:
- The exact fastening and its receiving ring are identifiable.
- The moving opening stays sharp and visible.
- Fingers do not hide the decisive insertion or release.
- The edit preserves the important action.
- The conclusion does not promise strength, accessibility, or ease you have not demonstrated.
Save a reference photo of the setup so the next tutorial starts with a repeatable working distance. When the lesson is clear, create your next-post plan around the question your footage genuinely answers.
InsightTok AI Team
Expert in TikTok growth strategies and social media analytics. Helping creators reach millions with data-driven insights and AI-powered recommendations.
Ready to Grow Your TikTok?
Get AI-powered analytics and content recommendations to boost your views and engagement.
Start Free TrialRelated Posts

How to Protect Your TikTok Videos From AI Remixes and Unauthorized Reuse in 2026
Learn how to document ownership, detect stolen TikTok videos, preserve evidence, and respond to AI remixes. This 2026 framework helps creators protect valuable content without spending hours on enforcement.
Knitting TikToks: Show Which Ladder to Pick Up Next
A filming workflow for knitting creators: make dropped-stitch ladder order visible, explain knit-versus-purl decisions, and plan a focused follow-up lesson.

TikTok AI Content Pricing Strategy 2026: Stop Charging Less Because You Create Faster
AI may cut production time, but it should not automatically reduce your creator fee. This guide explains how to price production, posting, usage, synthetic identity rights, exclusivity, and performance income.